Sync your iPhone, iPad, or iPod touch with iTunes on your computer using USB
With iTunes, you can sync your music, movies, TV shows, photos and more. After you sync, the content on your iPhone, iPad, and iPod touch matches the content in your iTunes Library on your computer.
Before you begin
Before syncing with iTunes, consider using iCloud or similar services to keep your content automatically up to date on all of your devices. Learn more about your other options.
If you prefer to use iTunes to sync your content, follow the steps below to set up syncing in iTunes using USB.

What you can sync with iTunes
- Albums, songs, playlists, movies, TV shows, books, podcasts, audiobooks, and tones.
- Photos and videos. To sync photos and videos using iTunes, you can use a supported photos app or sync from a specific folder on your computer. Learn more about how to keep your photos and videos up to date on all of your devices.
- Contacts and calendars.
- Device backups that you made using iTunes.
Sync your content with iTunes
Follow these steps to manually sync the content from your computer to your iOS device:
- Open iTunes. Make sure that you have the latest version.
- Connect your device to your computer using the included USB cable. Your connected device appears as an icon in the upper-left corner of the iTunes window. Learn what to do if you don't see the icon.

- Click on the device icon
 . Look under Settings on the left side of the iTunes Window for a list of the content types that you can sync from your iTunes library to your device.
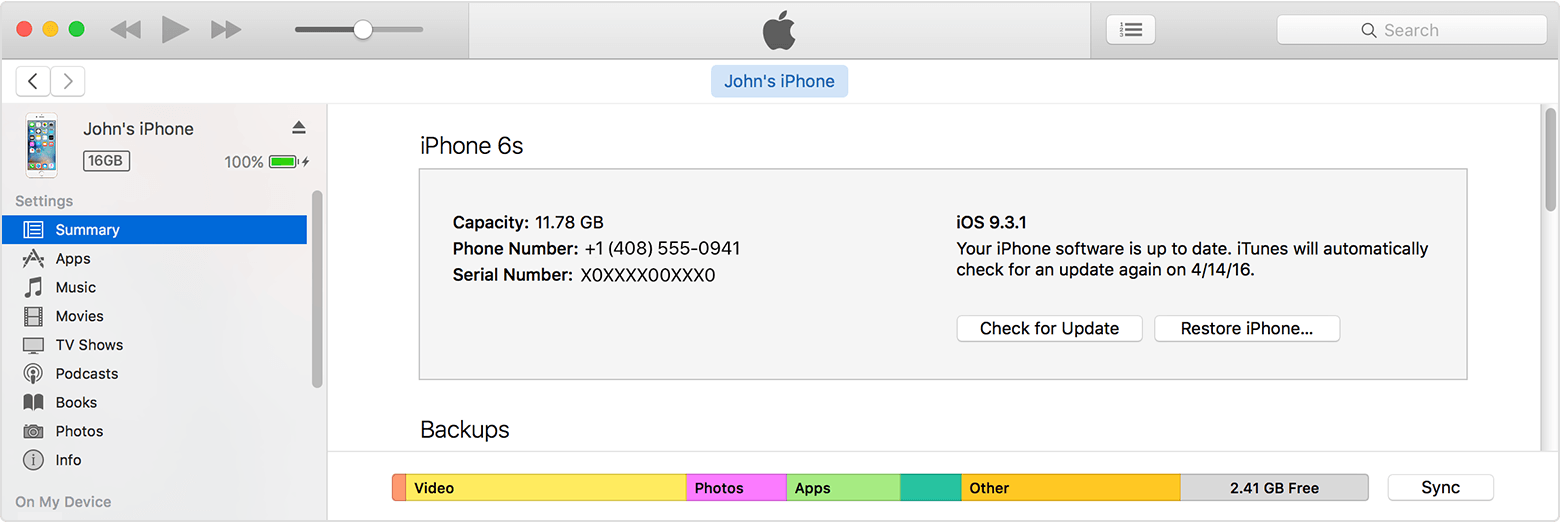
If you don't have certain content in your iTunes library, you might not see some tabs. For example, if you don't have any podcasts in your library, you won't see a Podcast tab.
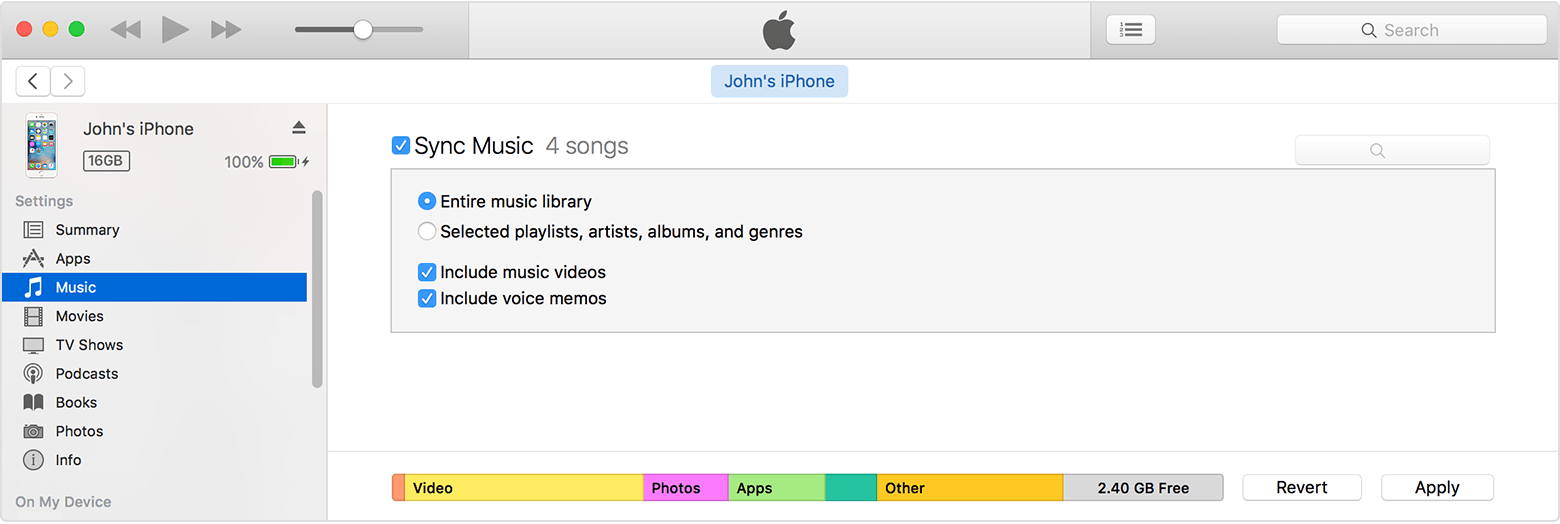
iTunes can't sync certain content, including mail accounts, notes, or bookmarks. Use iCloud to manage your mail, notes, and bookmarks across your devices. Some iOS apps might useiTunes’s File Sharing feature to transfer content instead of syncing. - Click the content type that you want to sync.
- In the main iTunes window, click the box next to Sync to turn on syncing for that content type. If there's a check in the box, syncing for that content type is already on.
 If you see a message that your iOS device is synced with another iTunes library after clicking the box, your iOS device was previously connected to another computer. If you click "Erase and Sync" in that message, all content of the selected type on your iOS device is replaced with content from your computer. Content that you didn't turn on syncing for isn't deleted from your iOS device. You can only sync your iOS device with one iTunes library at a time.
If you use iCloud or other services to keep your content up to date, syncing through iTunes might be disabled. - After you turn on syncing for a content type, you'll see additional options to customize your sync settings. Use these options to make sure that you’re syncing the content that you want synced.
- Repeat steps 4–6 for each content type that you want to sync.
- Click the Apply button in the lower-right corner of the screen to save your sync settings. If syncing doesn't start automatically, click the Sync button.
After you turn on syncing, your content syncs each time that you connect your iOS device to your computer and have iTunes open.
If you see a message that some of your content couldn't sync, your computer might not be authorized for that type of content. Make sure that your computer is authorized for the content that you're trying to sync.
Get help
- Learn what to do if you see an error when you try to sync your iPhone, iPad, or iPod touch with iTunes.
- Keep your photos safely stored and up to date on all your devices.
- Learn what to do if you can't sync Outlook contacts and calendars.
Turn off syncing in iTunes
- Open iTunes. Make sure that you have the latest version.
- Connect your device to your computer using the included USB cable. Your connected device appears as an icon in the upper-left corner of the iTunes window. Learn what to do if you don't see the icon.
- Click on the device icon .
- Under Settings on the left side of the iTunes Window, click the content type for which you want to turn off syncing.
- In the main iTunes window, uncheck the box next to Sync. All of that content type removes from your iOS device.
- Click the Apply button to save your sync settings.
Learn more
- If you can successfully sync with iTunes using USB, you can also sync your iOS device over Wi-Fi.
- Learn how to transfer iTunes Store purchases.
- Learn how to import photos and videos to your computer.
Information about products not manufactured by Apple, or independent websites not controlled or tested by Apple, is provided without recommendation or endorsement. Apple assumes no responsibility with regard to the selection, performance, or use of third-party websites or products. Apple makes no representations regarding third-party website accuracy or reliability. Risks are inherent in the use of the Internet.Contact the vendor for additional information. Other company and product names may be trademarks of their respective owners.
Last Modified:
No comments:
Post a Comment