Friday, October 6, 2017

Boot-from-a-usb-drive-even-if-your-bios-wont-let-you

https://www.howtogeek.com/howto/16822/boot-from-a-usb-drive-even-if-your-bios-wont-let-you/
You’ve always got a trusty bootable USB flash drive with you to solve computer problems, but what if a PC’s BIOS won’t let you boot from USB? We’ll show you how to make a CD or floppy disk that will let you boot from your USB drive.
https://www.howtogeek.com/129815/beginner-geek-how-to-change-the-boot-order-in-your-computers-bios/
sshot-1
This boot menu, like many created before USB drives became cheap and commonplace, does not include an option to boot from a USB drive.
A piece of freeware called PLoP Boot Manager solves this problem, offering an image that can burned to a CD or put on a floppy disk, and enables you to boot to a variety of devices, including USB drives.
Put PLoP on a CD
PLoP comes as a zip file, which includes a variety of files. To put PLoP on a CD, you will need either plpbt.iso or plpbtnoemul.iso from that zip file. Either disc image should work on most computers, though if in doubt plpbtnoemul.iso should work “everywhere,” according to the readme included with PLoP Boot Manager.
Burn plpbtnoemul.iso or plpbt.iso to a CD and then skip to the “booting PLoP Boot Manager” section.
Put PLoP on a Floppy Disk
If your computer is old enough to still have a floppy drive, then you will need to put the contents of the plpbt.img image file found in PLoP’s zip file on a floppy disk.
To do this, we’ll use a freeware utility called RawWrite for Windows.
sshot-6
We aren’t fortunate enough to have a floppy drive installed, but if you do it should be listed in the Floppy drive drop-down box. Select your floppy drive, then click on the “…” button and browse to plpbt.img. Press the Write button to write PLoP boot manager to your floppy disk.
sshot-7
Booting PLoP Boot Manager
To boot PLoP, you will need to have your CD or floppy drive boot with higher precedence than your hard drive. In many cases, especially with floppy disks, this is done by default.
If the CD or floppy drive is not set to boot first, then you will need to access your BIOS’s boot menu, or the setup menu. The exact steps to do this vary depending on your BIOS – to get a detailed description of the process, search for your motherboard’s manual (or your laptop’s manual if you’re working with a laptop).
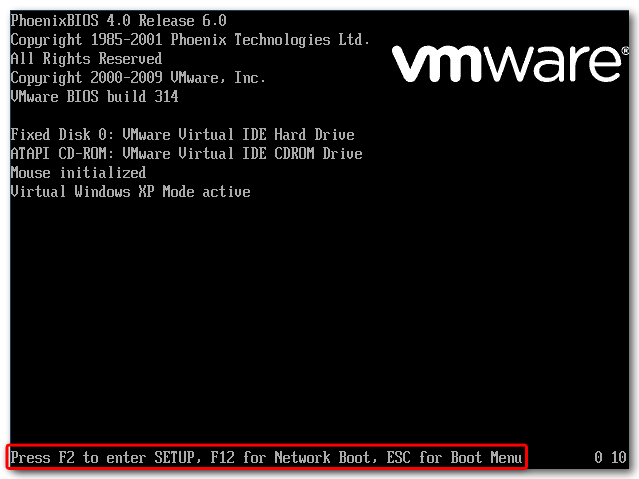
In general, however, as the computer boots up, some important keyboard strokes are noted somewhere prominent on the screen. In our case, they are at the bottom of the screen.
sshot-18
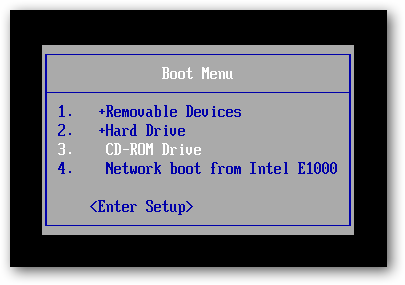
Press Escape to bring up the Boot Menu. Previously, we burned a CD with PLoP Boot Manager on it, so we will select the CD-ROM Drive option and hit Enter.
sshot-2
If your BIOS does not have a Boot Menu, then you will need to access the Setup menu and change the boot order to give the floppy disk or CD-ROM Drive higher precedence than the hard drive. Usually this setting is found in the “Boot” or “Advanced” section of the Setup menu.
sshot-17
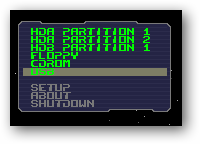
If done correctly, PLoP Boot Manager will load up, giving a number of boot options.
sshot-3
Highlight USB and press Enter.
sshot-4
PLoP begins loading from the USB drive.
sshot-5
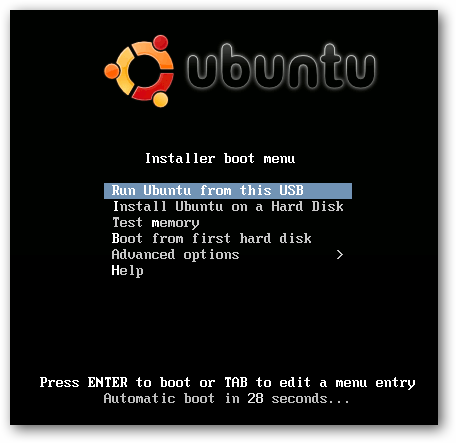
Despite our BIOS not having the option, we’re now booting using the USB drive, which in our case holds an Ubuntu Live CD!
sshot-8
This is a pretty geeky way to get your PC to boot from a USB…provided your computer still has a floppy drive. Of course if your BIOS won’t boot from a USB it probably has one…or you really need to update it.

How to Change Your Computer’s Boot Order


The boot order is controlled in your computer’s BIOS or UEFI firmware, depending on how new your computer is.
To access the BIOS, you’ll need to restart your computer and press a specific key at the start of the boot process. This key is generally displayed on-screen during the boot process. For example, you may see a message that says “Press <DEL”> to enter setup” or “Press F2 to access the BIOS.” Press the required key at the correct time and your computer’s BIOS will appear.
While Delete and F2 are probably the most common keys, your computer may require another key, such as F1, Escape, or Ctrl+Alt+Escape. If you don’t see the required key on-screen, consult your computer’s manual or search for your computer’s model name and “bios key” on Google. (If you built your own computer, consult the motherboard’s manual instead.)
bios-key-at-boot-up
On a PC with UEFI firmware—which most newer PCs that came with Windows 8 or 10 will have—you may not be able to press a key at boot to access this menu. Instead, you’ll first need to boot into Windows. Press and hold the “Shift” key as you click the “Restart” option in the Start menu or on the sign-in screen. Windows will reboot into a special boot options menu.
Click Troubleshoot > Advanced Options > UEFI Firmware Settings on this menu screen to access your computer’s UEFI settings screen.
This boot menu will also automatically appear if your PC is having trouble booting properly, so you should be able to access it even if your PC can’t boot Windows.
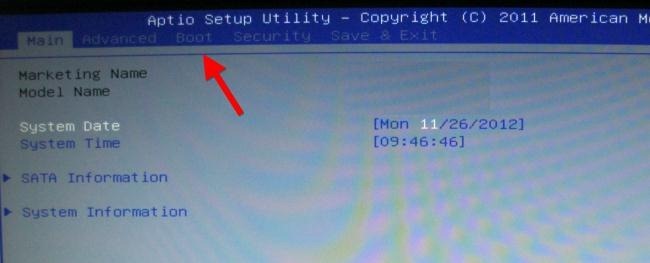
Once you’re in the BIOS or UEFI firmware menu, look for some sort of “Boot” option menu. If you’re lucky, there will be a tab at the top of the screen named Boot. If not, this option may be located beneath another tab.
boot-tab-in-bios
Use the arrow keys to navigate through the BIOS. To select something, press Enter. You’ll generally see a list of the keys you can use at the bottom-right corner of your screen. Some newer computers with UEFI firmware may allow you to use a mouse on this screen, too.
bios-keyboard-shortcuts
Locate the boot order screen that lists the boot devices. This may be on the Boot tab itself or beneath a Boot Order option.
bios-boot-devices
Select an option and press Enter to change it, either to disable it or specify another boot device. You can also use the + and – keys to move devices up or down in the priority list. (These steps may be slightly different on some computers; consult the list of keyboard shortcuts on your screen.)
change-bios-boot-order
Note that “USB drive” doesn’t appear as an option in the list, even though our computer has USB ports. If we connected a USB device to the computer before starting our computer and accessing this screen, we’d see the USB drive option in the list. Some computers display the USB drive option even when a drive isn’t connected, while some don’t.
The boot order is a priority list. For example, if “USB drive” is above “hard drive” in your boot order, your computer will try the USB drive and, if it’s not connected or no operating system is present, it’ll then boot from the hard drive.
To save your settings, locate the Save & Exit screen. Select the “Save Changes and Reset” or “Save Changes and Exit” option and press Enter to save your changes and restart your computer.
You may also be able to press a specific key to save your settings and reset the computer. Ensure you select the “save and exit” option, not the “discard changes and exit” option.
save-bios-changes
Once your computer restarts, it will boot using your new boot order priority.

How to Access Your Computer’s Boot Menu (If It Has One)

To reduce the need to change your boot order, some computers have a Boot Menu option.
Press the appropriate key—often F11 or F12—to access the boot menu while booting your computer. This allows you to boot from a specific hardware device once without changing your boot order permanently.
computer-boot-menu
On a UEFI-based PC—again, most PCs that shipped with either Windows 8 or 10 use UEFI—you can choose a boot device from the advanced boot options menu.
From within Windows, press and hold the Shift key and click the “Restart” option in the Start menu or on the sign-in screen. Your PC will restart into the boot options menu.
Select the “Use a device” option on this screen and you can choose a device you want to boot from, such as a USB drive, DVD, or network boot.
anh bộ đội cụ Hồ .